Showing posts with label Thanksgiving 2013. Show all posts

Monday, November 25, 2013

Toffee Chocoalte Pecan Pie

Toffee Chocolate Pecan Pie
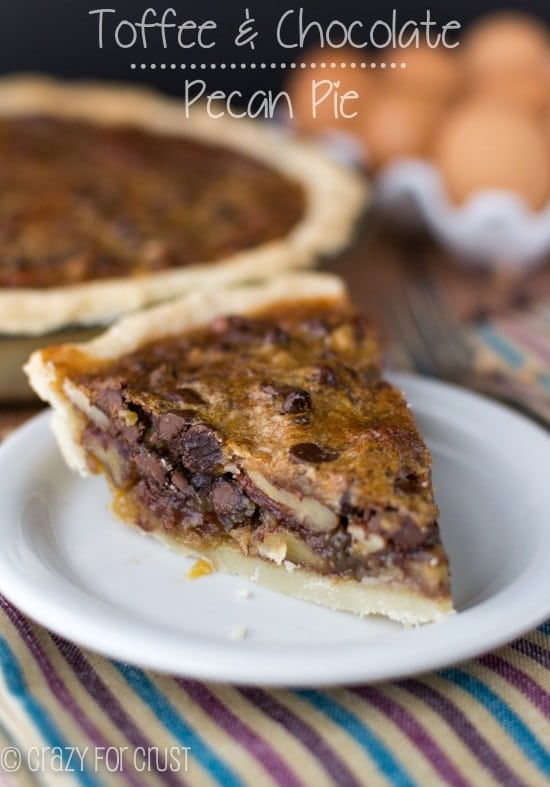
Ingredients
  • 1 pie crust, from a package of two or from scratch
  • 3 large eggs
  • 1 cup dark corn syrup (Karo)
  • 1/3 cup granulated sugar
  • 1/8 teaspoon salt
  • 1/4 butter, melted
  • 1 cup chocolate chips (semi-sweet or milk)
  • 1/2 cup toffee bits (Bits o’ Brickle or the kind with chocolate, either is fine)
  • 1 3/4 cups pecan halves
Instructions
  1. Preheat oven to 450F.
  2. Place your pie crust in your pie plate (recipe is written for a 9” pie plate) and crimp edges as desired. Chill until filling is ready and oven is preheated.
  3. Whisk eggs, corn syrup, sugar, salt, and melted butter together.
  4. Remove pie shell from refrigerator. Sprinkle the chocolate and toffee chips on the bottom. Sprinkle the pecans over the top of the chocolate and toffee. Pour filling over the top. Let it sit for a minute so the pecans can rise to the top.
  5. Place pie on a cookie sheet. Tear off strips of foil that are apporximately 1 1/2”-2” wide. Carefully mold them to your crust edge. This is to keep it from getting too brown.
  6. Place pie in the 450F oven and bake for 10 minutes. Then reduce heat to 350F. Bake for 25 minutes, then remove the foil strips (carefully - they’re hot). Continue baking for another 10-15 minutes until crust is lightly browned and filling is brown around the edges. It will still wiggle slightly in the center. (The total baking time is about 45-50 minutes.) Cool completely before cutting.

Tuesday, November 12, 2013

Twenty-Four Days of Thanksgiving: A little bit of Gratitude and whole lot of yummy..


Today I am grateful for my sisters , we have been through
 a lot together, and I love and cherish them very much...


Here is a Cute Cake Idea for Thanksgiving!!

Two bunt cakes stacked on top of each other + orange frosting = Pumpkin Cake!


Friday, November 8, 2013

Twenty-Four Days of Thanksgiving: A little bit of Gratitude and whole lot of yummy..


Today I am grateful for Toilet Paper.. 

I am so glad I live in this century cause

I would hated not having Toilet Paper!!!


I am going to be making one of these

at Pinterest Party Next week, but I had to share

this super cute idea with you from 


Wouldn't this look cute on your fireplace mantle or table at Thanksgiving?  Below are the directions to make your own!
Supplies Needed:
4- 2×4 boards cut into the following lengths 10.5 in., 5 in., 4 in., 3 in.
Coordinating pieces of Scrapbook paper (DCWV The Green Stack used here)
Distressing ink (optional)
Modge Podge
Paint brush
Paint (Coffee Bean by Plaid used in this project)
Scissors or paper trimmer
Vinyl lettering cut into words “Faith”, “Family”, “Friends” and “We Give Thanks”
Vinyl transfer tape
Sandpaper
Corner trimmer (optional)
Directions:
Sand the block edges to remove rough areas.  Paint the blocks brown and allow to dry.
 Cut scrapbook paper to fit the blocks.  Trim the paper slightly smaller than the wood (use corner trimmer to round edges of paper, optional).

Apply scrapbook paper to blocks using a thin layer of Modge Podge and allow to dry.  Lightly sand the ends of the paper to make it look worn and even with the blocks.
 Use the distressing ink on the paper to give it an antique look (optional).
Now it is time for the fun part!  Adding the vinyl letters!  Separate the vinyl letters from the backing.
Apply the vinyl lettering to blocks using the vinyl transfer tape (follow manufactures directions for your vinyl transfer tape.)
 Seal the blocks with another thin coat of Modge Podge, allow to dry and your project is complete!
Let’s get one more look at the finished project!  So cute!


Wednesday, November 6, 2013

Twenty- Four Days of Thanksgiving : A little bit of Gratitude and whole lot of yummy..


Today I am grateful for my Fur babies...

Without them I would be one depressed sad person...

Trixie & Kiya have brought so much joy to our lives!!


Head on Over Here to 
to make this Easy DIY Burlap Sign 


GiveThanksBurlapSignFirstCloseup

Tuesday, November 5, 2013

Twenty Four Days of Thanksgiving: A little Gratitude and whole lot of yummy!


Today I am Thankful for  my oldest son Avery,

he is thoughtful, kind, helpful, and I don't know what 

we do without him. 


Here is Today's Thanksgiving's  Recipe 

I will be sharing a recipe or idea every day to Thanksgiving!! 

This idea comes from No Biggie !! I have seen this done before, but this has

a free printable!! Awesome Sauce!


kami, thanks so much for having me on your fantastic website. i’m excited to share this thanksgiving snack mix party favor idea. now that i know how much my boys love this stuff, this mix is going to be a traditional treat every november!


thanksgiving snack mix 
• Bugles brand chips (2 bags is plenty)
• classic knot mini pretzels
• candy corn or corn nuts (i used both)
• dried fruit (i like craisins)
• sunflower seeds
gather your supplies and buy equal amounts of ingredients. i was delighted to find all of them, except for the Bugles, in the bulk foods aisle. yay, bulk foods does it again! (i had a tough time spotting the classic candy corn and almost had to get the christmas colored candy corn. yikes, that woulda killed it. luckily the orange candy corn was just an aisle away. phew.) combine the snack mix in a giant bowl–adding more and stirring as you go–whistling (and tasting) while you work. if you need to make party favors or even a hostess gift, scoop your snack mix into cellophane bags and tie with baker’s twine or ribbon. be sure to add a description card of your snack mix too, everything in it represents a special thanksgiving memory!
happy thanksgiving.


Monday, November 4, 2013

Dollar Store Decorating: Acorn Frame & Cute Candle


This Cute Idea comes from 320 Sycamore .. check out her blog for more ideas!

First up, an acorn frame. We collected some acorns on a hike we took last month,acorn frame

I just picked up a dollar store frame, and hot glued them around the edge. I included a picture form the hike. I just want to kiss those cute faces.
acorns
From that same dollar tree, I grabbed some cinnamon sticks, and a vanilla candle.dollar tree cinnamon sticks

I cut the cinnamon sticks with my little garden pruner and hot glued them to the candle.cinnamon stick candle

That’s it.acorn frame white pumpkin

Twenty- Four Days of Thanksgiving: A little Gratitude, and a whole lot of yummy


Today I am Thankful for  my husband 

is mechanically inclined, and can fix our jeep when ever something is wrong ~!!


Here is Today's Thanksgiving's  Recipe 

I will be sharing a recipe or idea every day to Thanksgiving!! 


Classic Sweet Potato Casserole

Ingredients

  • 4 1/2 pounds sweet potatoes
  • 1 cup granulated sugar
  • 1/2 cup butter, softened
  • 1/4 cup milk
  • 2 large eggs
  • 1 teaspoon vanilla extract
  • 1/4 teaspoon salt
  • 1 1/4 cups cornflakes cereal, crushed
  • 1/4 cup chopped pecans
  • 1 tablespoon brown sugar
  • 1 tablespoon butter, melted
  • 1 1/2 cups miniature marshmallows

Preparation

1. Preheat oven to 400°. Bake sweet potatoes at 400° for 1 hour or until tender. Let stand until cool to touch (about 20 minutes); peel and mash sweet potatoes. Reduce oven temperature to 350°.
2. Beat mashed sweet potatoes, granulated sugar, and next 5 ingredients at medium speed with an electric mixer until smooth. Spoon potato mixture into a greased 11- x 7-inch baking dish.
3. Combine cornflakes cereal and next 3 ingredients in a small bowl. Sprinkle over casserole in diagonal rows 2 inches apart.
4. Bake at 350° for 30 minutes. Remove from oven; let stand 10 minutes. Sprinkle marshmallows in alternate rows between cornflake mixture; bake 10 minutes. Let stand 10 minutes before serving.

Wednesday, October 30, 2013

Dollar Store Decorating: Turn Dollar Store Decor into something fabulous !


Here is a simple idea for The holidays!! 


cournecopia

Simple DIY Instructions from Sisteroo

1. Buy tacky bright artificial fall foliage, pumpkins, apples, etc. Throw in a few pine cones for texture.

2. Spray paint with Krylon gold and silver metallic spray paint. I used silver as the base, and puffed just the tiniest wisps of gold paint from a distance--just to dust the tops of the items with pale gold dust.

3. Dot a few of the pumpkins with glue and sprinkle on a bit of silver glitter.

4. Arrange. If you have a thick satin ribbon, wrap it around the edge of your awesome glittery pile of harvest bounty.

Saturday, October 19, 2013

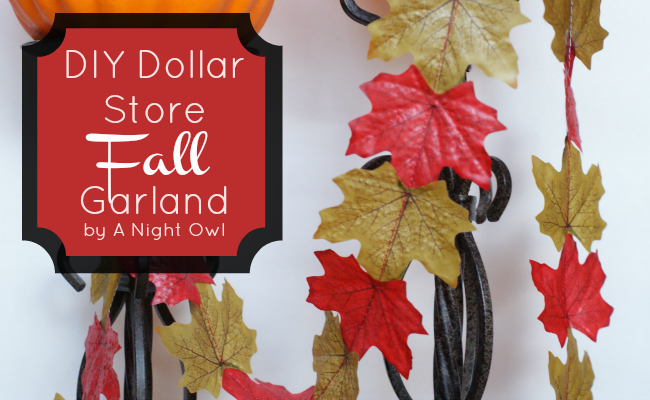
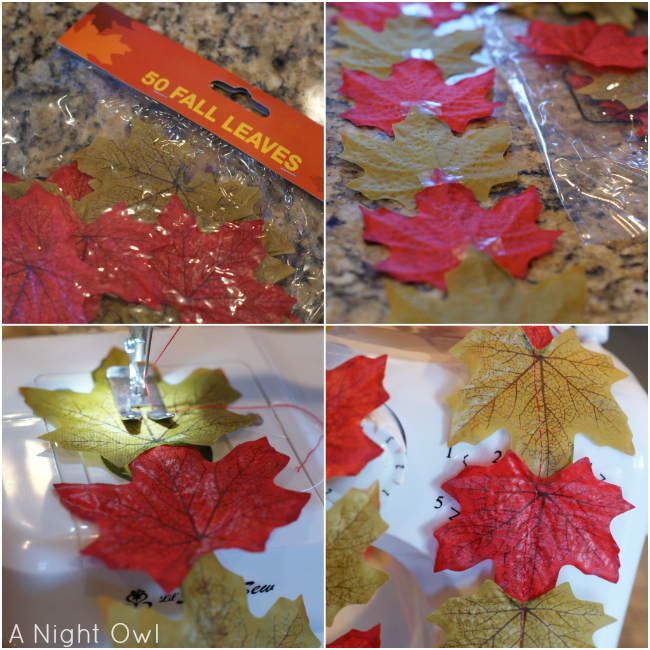
Dollar Tree Decorating: Fall Garland

                        DIY Dollar Store Fall Garland 
                                          from A Night Owl Blog


Here is another Cute Idea from the Dollar Tree to decorate with :)


Friday, October 18, 2013

Dollar Tree Decorating: Fall Leaf Wreath


is such a cute, creative and frugal idea :)


I found these big felt leaves from the dollar tree and knew I wanted to use them in a project.  I decided to use them for my new front door decor.  I just loved all the fun fall colors they came in.  I laid them out in a pattern I liked and got the rest of my supplies ready.
For this project you will need:
Felt leaves
a hanger
felt scraps
hot glue
a piece of burlap
brown paint
fabric stiffener
paint brush
vinyl, contact paper, stencils 

Working from the backside first, I hot glued the bottom 2 leaves to my hanger.  I wanted them to really stay put and hold so once I covered the hanger with hot glue, I covered it with a scrap piece of felt.  I did the same for both ends of the wreath.  Then I flipped it over and worked from the front side.
I just worked my way around the wreath, layering and hot glueing the leaves onto each other until I felt they were really attached.
Next I worked on the banner.  I drew about a 3 inch wide by 18 inch long semi arch for my banner onto my burlap and cut it out.  As you can see it isn't perfect, but hey it gives it character! ;)  I worked with my burlap for a minute or two to make sure I could create the look I was going for.  Then I covered my work surface with freezer paper.  You can use what ever you have on hand.  Wx paper and parchment paper would work too.  You just don't want the fabric stiffener sticking to anything.
Squeeze the fabric stiffener right on to the burlap and use a sponge brush to cover the entire surface.  While it is still wet, shape the burlap into your banner.  Hopefully the pictures will help you get an idea of how I did mine.  Using a pen and a book covered in freezer paper, I shaped the ends of my banner to look like they are "flying".  Then let the fabric stiffener dry.
I used my cricut and some contact paper to create my word WELCOME.  (You could use a stencil, vinyl or even free hand this part.)  I placed the letters on my banner and then used my dark brown acrylic paint and painted them.  Once it had dried, I positioned it onto the top of my wreath where I wanted it to go.
 Then I used hot glue to tack down the banner.  I also added a scrap of felt to the back of the banner where it crossed the hanger for added support.
Then it was ready to hang on my front door.